In this article
- How it works
- 1. Start with wrists attached, feet free
- 2. Try one pair of limbs at a time
- 3. Face the cross for a front-facing setup
- 4. Face away for back access
- 5. Add the ankles only after a fit check
- Safety points that matter
- How to judge a cross at home or in a rental
- Where to find stays with a St. Andrew’s cross
- Frequently asked questions
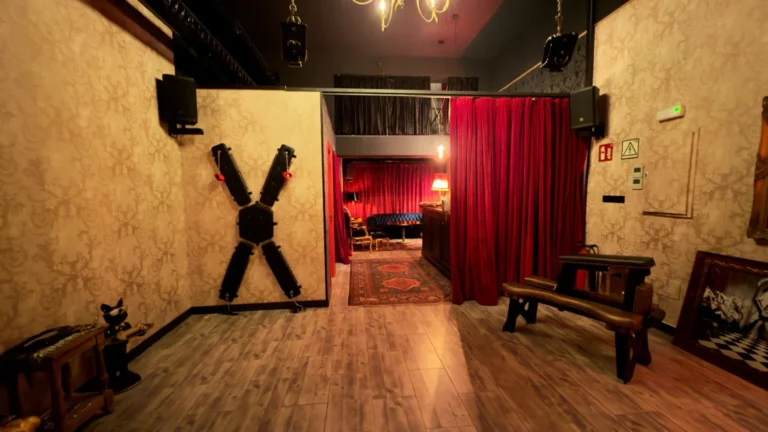
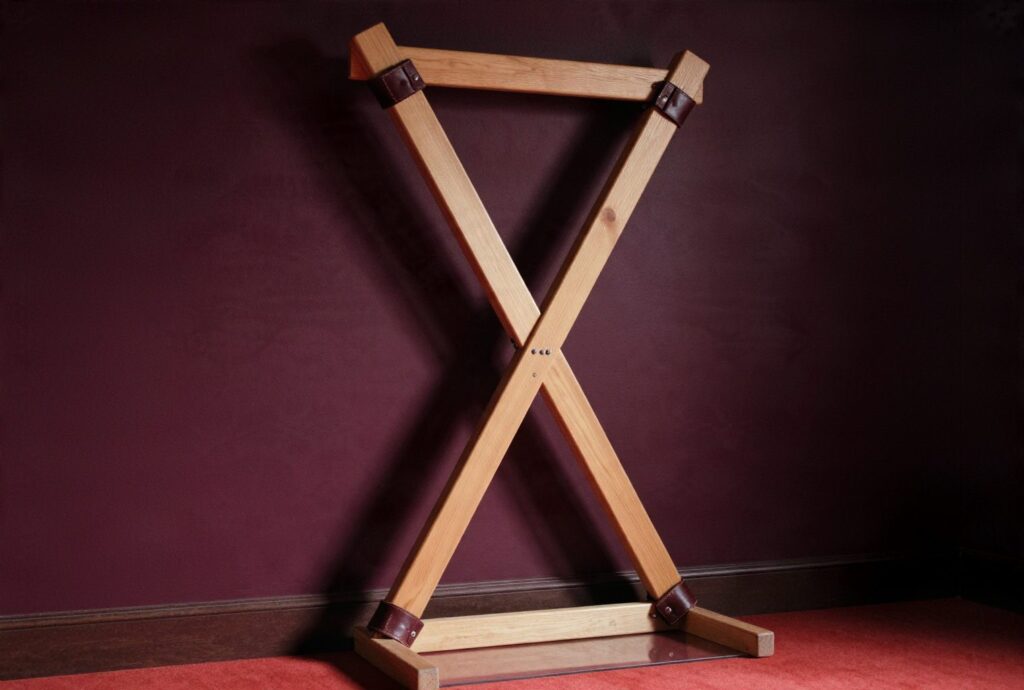
For st andrews cross positions, the simplest place to begin is an upright X-shaped restraint frame with your feet still supported by the floor. A St. Andrew’s cross, also called an X-cross, X-frame, bondage cross, saltire cross or BDSM cross, holds the wrists toward the upper arms and the ankles toward the lower arms. The familiar result is a standing spread-eagle position, but the furniture does not make every position safe by itself.
Think of this as a visual checklist, not a catalog of dramatic photographs. Your first scene should be easy to stop, easy to communicate through and modest in its demands on the shoulders, wrists, hips and knees. The right cross is the one that fits the person and the room, not the one with the boldest product description.
The cross may stand on its own or attach to a wall. It may be made from wood, metal or mixed materials, with optional padding. Those details affect fit and setup, but material alone does not prove structural safety.
How it works
The frame creates four broad attachment areas in an X shape. In the standard upright arrangement, the wrists attach near the upper arms and the ankles near the lower arms. The body remains standing rather than hanging. That distinction matters: suspension, inversion and partial suspension are separate practices and should not be folded into a beginner setup.
You can face the cross or face away from it. Facing the cross generally gives the person behind access to the back of the body; facing away changes which side is accessible. The frame has not become safer or riskier merely because you turned around. Shoulder angle, foot support, restraint fit and communication still do the real work.
Before any restraint is attached, stand in position fully clothed. Place your hands and feet where the cuffs would sit. Check that your feet can stay comfortably supported and that your shoulders are not pulled upward, backward or into an uncomfortable stretch. Try stepping away. If the furniture, cuffs or room do not allow that simple rehearsal, stop there.
| Feature | What it changes |
|---|---|
| Freestanding frame | Needs a stable base and suitable floor contact |
| Wall-mounted frame | Needs sound fixings and an appropriate wall |
| Padding | May change contact comfort, not structural strength |
| Adjustable points | May improve fit, but require careful inspection |
| Quick-release cuffs | Make a rapid release easier |

1. Start with wrists attached, feet free
This is often the least restrictive way to learn the furniture. Stand facing the cross or facing away from it, and attach only the wrists. Keep both feet on the floor with enough freedom to shift your weight and step out. The goal is to notice how the frame changes your shoulder position, balance and range of movement before adding anything else.
Keep the wrists in a neutral, comfortable line. Do not use the cuffs to force the hands higher, farther apart or behind the body. Ask how the shoulders feel, then ask again after a short pause. Feet on the floor are not a decorative detail; they are your first route out.
This variation is useful for checking the room as well. Confirm that the partner can reach the release points, that safety shears are within immediate reach and that nobody needs to cross the room to help. Never leave a restrained person alone, even for a quick task.
2. Try one pair of limbs at a time
For a shorter trial, attach one pair of limbs and leave the other pair free. That may mean wrists attached while the ankles remain loose, or ankles attached while the hands remain free. The second option still requires careful attention to balance and communication, so it is not automatically easier.
Choose the version that lets the person communicate clearly and return to a neutral standing posture. A free hand can help with a stop signal or release, while free feet can help with balance. Either way, agree in advance on the exact arrangement and how it will end.
Do not improvise a new anchor point because the intended one seems inconvenient. Decorative rings may look sturdy while having no structural purpose. Use only attachment points that the host or maker identifies for restraint, and inspect them before use.
3. Face the cross for a front-facing setup
Facing the cross is the familiar visual arrangement. Place the feet comfortably apart, keep the knees soft rather than locked, and let the body remain upright. Attach the wrists and, only if the fit is good and the communication plan is working, consider attaching the ankles as well.
The person should not need to lean into the frame to stay balanced. The X shape does not distribute weight evenly in every model, and a photograph cannot tell you how the frame fits a particular body. If the shoulders are being pulled, the feet cannot stay supported or the person is working hard to remain upright, release and change the setup.
For a first scene, keep the focus on position and check-ins rather than adding several other activities. A blindfold, gag or headphones can wait until communication and emergency release have already been tested without them.
4. Face away for back access
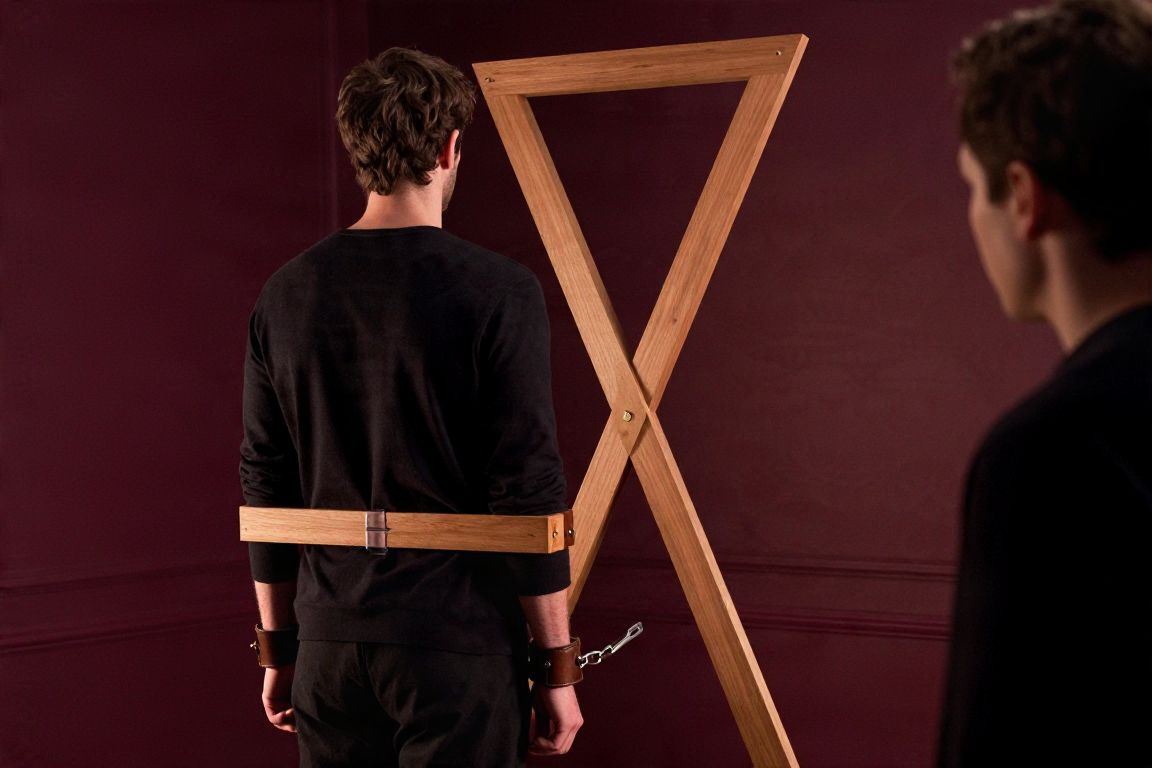
Facing away from the cross changes access while keeping the basic upright posture. Begin with the same clothing-on fit test. Check the line from each wrist to its attachment point, then check each ankle. The back-facing arrangement can make it harder for the restrained person to see what is happening, so verbal and nonverbal signals deserve extra attention.
Agree on a safeword and a clear nonverbal signal before attaching anything. A safeword is not enough if the person cannot speak reliably. The signal might be a hand movement or another action that can be made from the chosen posture. The observing partner should know exactly what it means and respond without debate.
Ask about pressure, numbness, tingling, temperature and fatigue throughout. A quiet room does not mean a comfortable body. If the person cannot answer clearly, stop and release.
5. Add the ankles only after a fit check
Once a wrists-only trial has gone well, you may test the standard four-limb arrangement: wrists toward the upper arms of the X and ankles toward the lower arms. This is still standing restraint. It is not a reason to lift the feet, pull the body away from the frame or introduce an improvised rope system.
Attach one restraint at a time and check the person’s posture after each change. The feet should remain comfortably supported. The knees should not be forced straight, the hips should not be twisted, and the shoulders should not be drawn upward or backward. If the geometry works for one person but not another, believe the body in front of you.
Use restraints that can be released quickly. Keep safety shears or another suitable emergency-release tool immediately beside the scene, not in a drawer across the room. Agree on the approximate duration, but do not treat it as a target. There is no universal safe time limit; release before fatigue makes the position harder to control.
Safety points that matter
Consent should cover the exact position, restraints, activities, risks, check-in method, stop signals and release plan. It should be specific, informed, freely given and reversible. Do not use alcohol or impairing drugs; they can reduce judgment and the ability to notice pain, circulation changes or breathing problems.
Inspect the complete system before every use: the base, floor contact, bolts, welds, hinges, D-rings, cuffs, padding and any wall fixings. A wall-mounted cross needs suitable installation, not merely a screw that happens to fit. A freestanding cross needs a stable base. There is no universal weight capacity, so assess the particular frame, hardware, restraints and person as one system.
Stop immediately for numbness, tingling, coldness, color change, loss of sensation, unusual weakness, dizziness, nausea, shortness of breath, chest discomfort, severe pain, panic or an inability to communicate. Release rather than waiting to see if a symptom settles. If the plan involves joint stress, rope bondage, suspension or uncertainty about anatomy or equipment, learn hands-on from an experienced, safety-focused educator or class.
Keep neck pressure, strangulation, breath restriction, chest compression, suspension, partial suspension and inversion out of a beginner cross scene. Pressure on the neck can cause serious injury even when consent is present. No position becomes safe because it appears in pornography, a product photograph or a rental listing.
Our advice: begin with feet supported, wrists free to release quickly and a partner who watches rather than assumes. If the fit is questionable, the scene is already telling you to stop.
How to judge a cross at home or in a rental
A good inspection is unglamorous, which is precisely why it works. Look at the frame from the floor upward. Check for movement at the base, cracks, loose hardware, damaged welds, sharp edges and worn cuff material. For a wall-mounted model, ask how it is fixed and whether the attachment points are intended for restraint. For a freestanding model, check that the floor is level enough for the base to remain stable.
Ask for the maker’s instructions and any stated load rating, but do not treat “heavy-duty,” “secure” or “professional” as independent verification. Product dimensions vary substantially. Published examples range from about 72 inches high and 42 inches wide to about 78 inches high, 35 inches wide and 36 inches deep. A portable example measures about 36 by 96 inches and breaks down to a package about 55 by 16 by 8 inches. These are observed examples, not a standard size.
Materials also vary. Commercial listings include wood, steel, iron, foam, vinyl, vegan leather and powder-coated metal. Padding may make contact more pleasant, but it does not answer the important questions about fixings, balance or release. If a listing gives only a glamorous photograph and no installation or attachment information, ask the host before paying.
Prices change, and custom furniture may be made to order. Prices checked in November 2026 showed about $295–$435 (€264–€390) for basic wall-mounted or portable models, about $399–$1,169 (€357–€1,047) for compact or adjustable models, and about $1,099–$2,010 (€984–€1,800) for larger or premium freestanding models. A made-to-order aluminum model was about $3,025 (€2,710), before possible international shipping. Treat these as observed examples, not market standards.
Where to find stays with a St. Andrew’s cross
Kinkstay lists private dungeons, kink-friendly rooms, love rooms and other stays where hosts declare the installed gear. The atlas reads each listing but does not visit the rooms, so confirm the details directly with the host. Ask whether the cross is freestanding or wall-mounted, which restraints are supplied, whether the attachment points are structural, and whether the room allows enough space to step away.
You can browse stays with a St. Andrew’s cross and compare the listing details before choosing a region or room. Kinkstay has more than 240 stays with a St. Andrew’s cross, but the count describes listings, not a guarantee that every frame suits every body. Booking is handled by the host or the partner platform named on the stay’s page.
For the wider furniture picture, our BDSM furniture guide explains how a cross differs from other restraint furniture. Before a stay, the practical questions in our booking question checklist can help you ask about equipment without relying on vague labels.
Frequently asked questions
What is the safest St. Andrew’s cross position for a beginner?
Start with a standing position in which the feet remain on the floor and only the wrists are attached. Test the fit while fully clothed, keep a clear path to step away and add ankle restraints only if the posture remains neutral and communication is reliable. No position is automatically safe for every person or frame.
Should I face the cross or face away from it?
Either direction can be used for an upright setup, and the choice changes which side of the body is accessible. Facing away may require more deliberate verbal and nonverbal communication because the restrained person cannot see what is happening. Choose the direction that gives the best fit, visibility and release plan.
How do you attach wrists and ankles to a St. Andrew’s cross?
In the standard arrangement, the wrists attach toward the upper arms of the X and the ankles toward the lower arms. Use only identified attachment points and restraints that release quickly. Check that the feet stay supported and that no shoulder, wrist, hip or knee is forced into an uncomfortable angle.
Can you use a St. Andrew’s cross without tying all four limbs?
Yes. A beginner can try wrists-only, ankles-only or another one-pair arrangement with the remaining limbs free. These are variations, not guarantees of safety, so balance, communication and a rapid-release plan still matter.
How long can someone safely stay on a St. Andrew’s cross?
There is no universal time limit. Fatigue, temperature, circulation, restraints, body position and continuous monitoring all change the answer. Keep the first trial short and release immediately for warning symptoms, distress or any communication problem.